Friday, 3 February 2012
How To Make A Paper Folded Butterfly
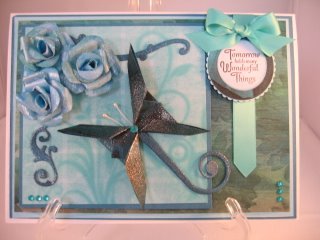
I recently found a site that teaches you how to make a pretty folded paper butterfly in a few simple steps(Like the one in this picture). The butterfly can be used anywhere,example styling your cards that you make! This tutorial is easy and simple to understand. So, why not try making it? You might end up with a Smashing Creation!
Possibilities Are Endless.
STEP 1
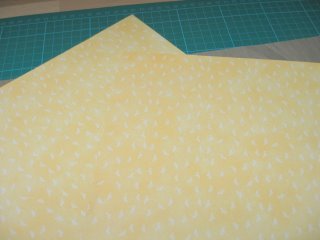
You will need two matching pieces of paper for this and because the projects is small try to keep your pattern small too otherwise it will be lost on the folds.
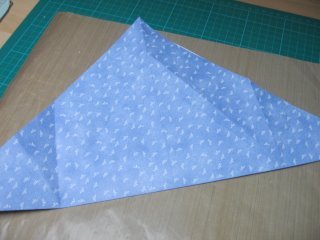 Place your chosen paper face down and make the first fold from corner to corner.
 Crease the paper and then open it out.
Crease again in the opposite direction, again from corner to corner.
You will get a really sharp crease by using a Bone folder.
STEP 2
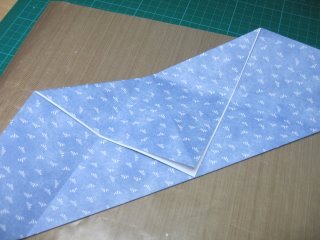
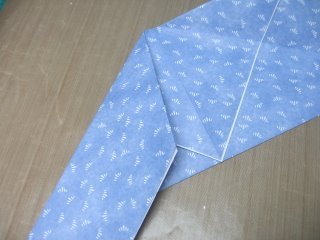
Take the point and crease it to the fold in the paper.
You can see that some of the white to the paper is showing so if you ink the edges before you fold then they won't show on the finished butterfly.
STEP 3
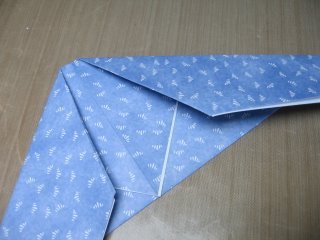
To fold the wings I keep my finger in the centre, as this is the bit that will form the body.
Take the part of the wing that is opposite the point and fold it down towards the point....
..
.and do the same for the other side.
The photo shows you how it should look when you have done this.This is the first part of the wings and now you need to do exactly the same with the other matching piece of paper.
Try to keep your wings the same so that when they are side by side they don't look odd.
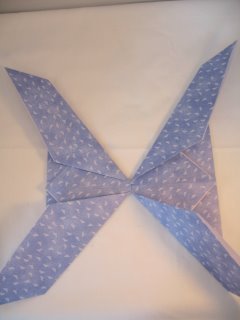 The two wings will now be ready for you to attach them to the front of your card.You can add some of the little stamens for the antennea or a small piece of wire that you can bend into shape.
 Watch the tutorial video:
This awesome tutorial i found on Card Making Magic
Its definitely one of the Smashing Creations!!!
Subscribe to:
Post Comments (Atom)

0 comments:
Post a Comment